Categories
Farming Gardening

Crop Rotation for Growing Vegetables

Crop Rotation for Growing Vegetables

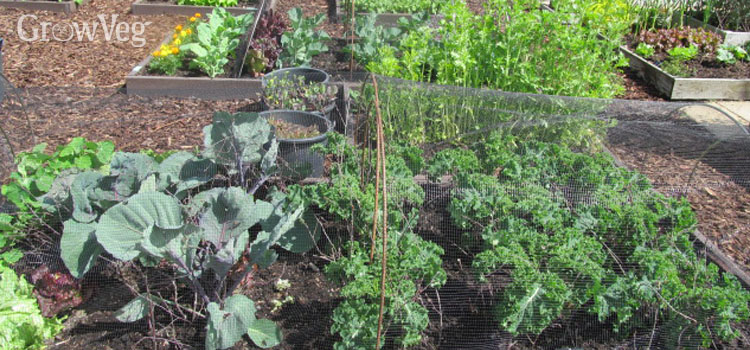
The sight of any field, large or small, full of one type of crop ripening in the sun may now be a quintessential part of the countryside, but this mass-production method of cultivating single species has long been known to cause more problems than it solves.

For one, large plantation of the same crop makes an easy target for pests. For this reason, non-organic growers may feel compelled to spray the whole area with pesticides, perpetuating the cycle of contaminants entering the food stream. Second, Soil nutrients are depleted when the ground is occupied by large numbers of the same type of plant. This problem is compounded if the ground is again used for the same crop during next seasons – leading to soil impoverishment to an extent that use of artificial fertilizers becomes inevitable. And soil subjected to the same mechanical processes year after year will inevitably become compacted.

Scale does play a part, however underlying problem is the same. While a small-scale, backyard gardener may not employ such intensive practices as a large scale farmer, these problems may also be encountered on a smaller scale. The gardener may see a drop in plant health and productivity if crops are grown in the same spot for many years.

To avoid these pitfalls, adopting a crop rotation plan becomes necessary. The principle is straightforward enough – the same vegetables should not be planted in the same place year after year. As a system of organic gardening, crop rotation has many advantages:

  • It lessens the need for pest control and threats arising from pests
  • Reduces the spread of soil-borne disease
  • It avoids nutrient depletion in the soil

Combined with other organic methods, crop rotation offers an excellent defense against all kinds of pests and disease.

How Crop Rotation Works

Crop rotation is exactly what it sounds like – no secrets here! Simply divide your growing space into a number of distinct areas, identify the crops you want to grow and then keep plants of the same type together in one area. Now come the next year and for all the years afterwards, the plants grown in each given area are changed, so that each group (with its own requirements, habits, pests and diseases) can have the advantage of a new patch of ground.

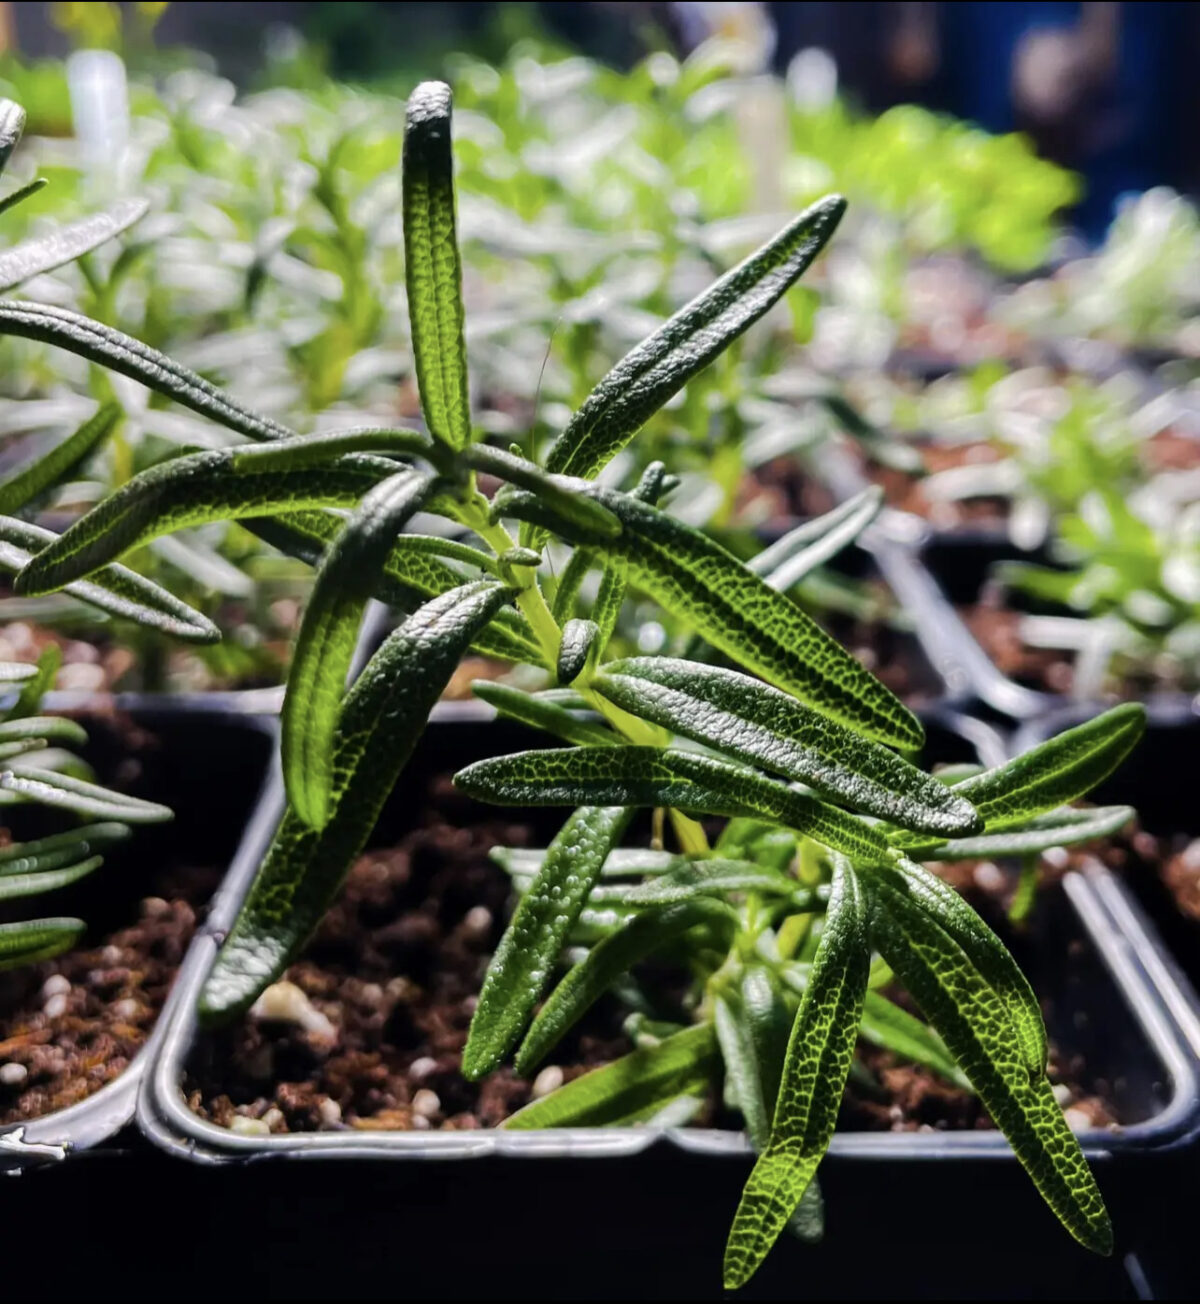
Most crop rotation schemes tend to run for at least three or four years, as this is the number of years it takes for most soil-borne pests and diseases to decline to harmless levels. If your beds are divided into four groups, this means that members of each plant family won’t occupy the same spot more than once in a four-year period. Care needs to be taken to select the plant type as perennial vegetables such as soft fruit, rhubarb, asparagus and globe artichoke aren’t replanted each year, so they may need their own dedicated bed.

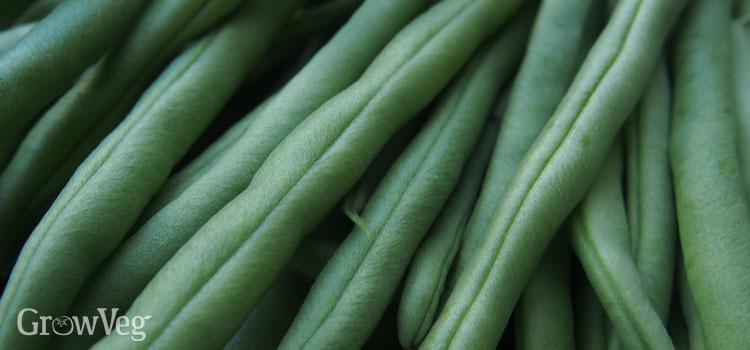
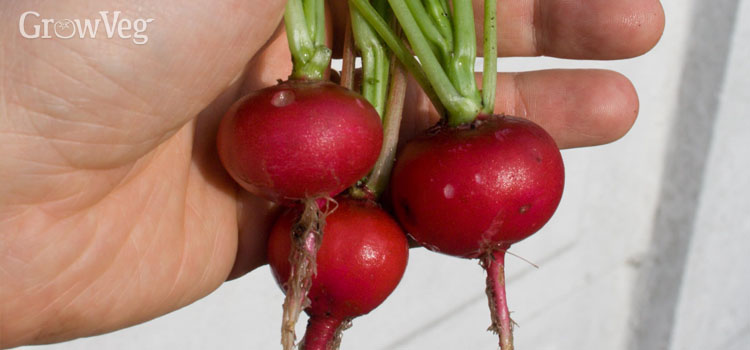
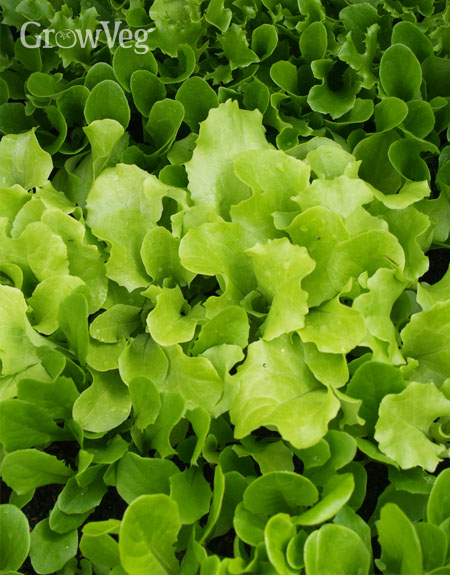
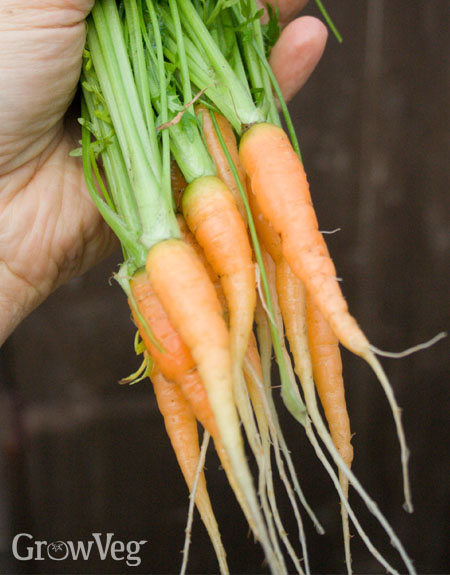
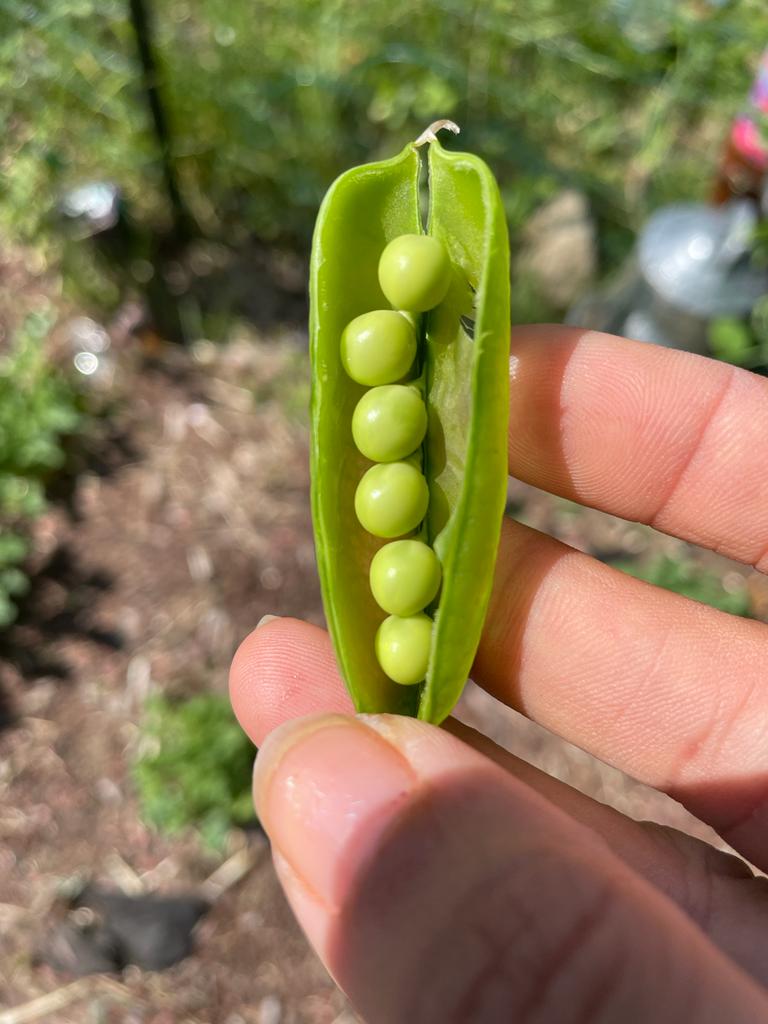
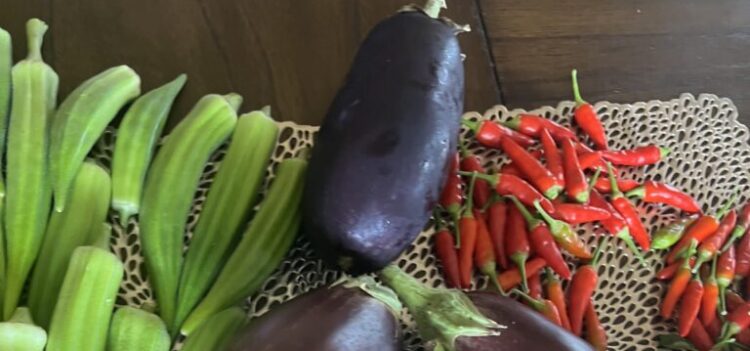
The traditional advice is well intentioned, but also flawed. It recommends that you divide crops into four main groups as follows: Legumes (bush beans, peas, pole beans, broad beans); root vegetables (radish, carrot, potato, onion, garlic, beet, rutabaga, sweet potato, shallots); leafy greens (spinach, chard, kale, cabbage, cauliflower, broccoli, spinach); and fruit-bearing(tomato, sweetcorn, cucumber, squash, pumpkin, zucchini, eggplant).

Limitations of the Traditional Method of Crop Rotation

While it is certainly beneficial to move crops around, this practice on its own is somewhat hit and miss. What’s more, such simplified groups don’t tell the whole story, as the growth habit (i.e. root, fruit, leaf etc) does not bear on the classification of the plant. For instance, although they appear radically different, potato and tomato are in fact members of the same family. According to the traditional scheme one could follow the other, but since they are so closely related, they will attract the same pests and use up the same nutrients from the soil. To avoid this type of confusion, it is highly recommended to take help of a planning tool or a local expert to devise a more sophisticated classification system. The image below is an example of a planning tool:

Crop families in the Garden Planner

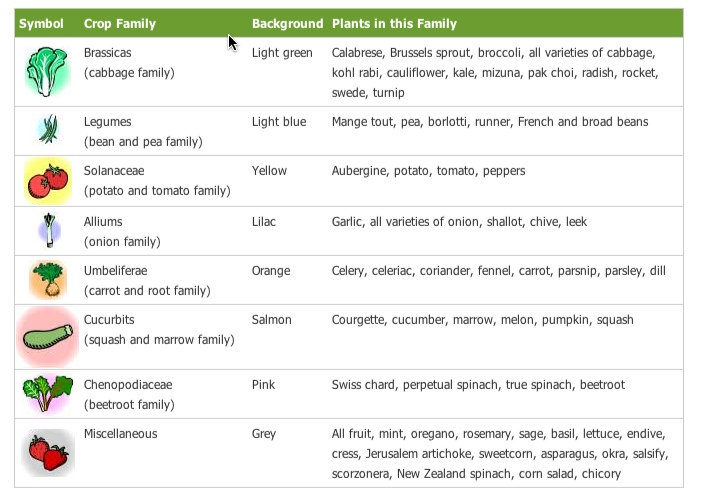
Choosing among categories offer greater flexibility and allow a wider permutation of crops planted over the seasons which enhances the chances of soil replenishment. Remember the goal of crop rotation is to give a chance to soil to recover. You can sow plants from the Miscellaneous group wherever you have free space. Members of the Chenopodiaceae family, such as beets and spinach are also relatively unproblematic, and can follow most other crops.

Planning the Order of Crop Rotation

Brassicas follow legumes: Sow crops such as cabbage, cauliflower and kale on soil previously used for beans and peas. The latter fix nitrogen in the soil, whilst the former benefit from the nutrient-rich conditions thus created. Potatoes also love nitrogen-rich soil, but should not be planted alongside brassicas as they like different pH levels.

Very rich soil and roots don’t mix: Avoid planting root vegetables on areas which have been heavily fertilized, as this will cause lush foliage at the expense of the edible parts of the plant. Sow parsnip on an area which has housed demanding crops (such as brassicas) the previous season, since they will have broken down the rich compounds.

Example of a Four-bed Rotation

  1. Area 1: Enrich area with compost and plant potatoes and tomatoes (Solanaceae). When crop has finished sow onions or leeks (Allium) for an overwinter crop.
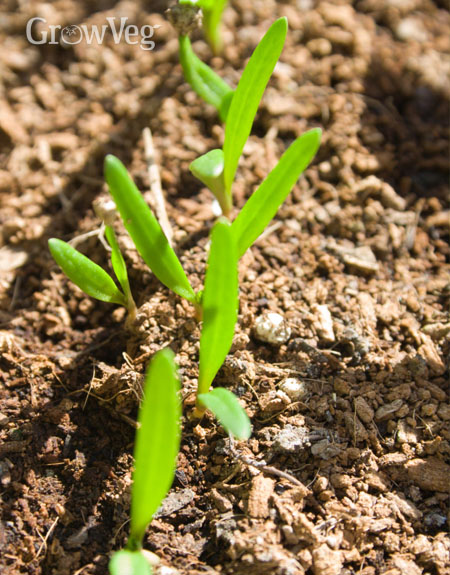
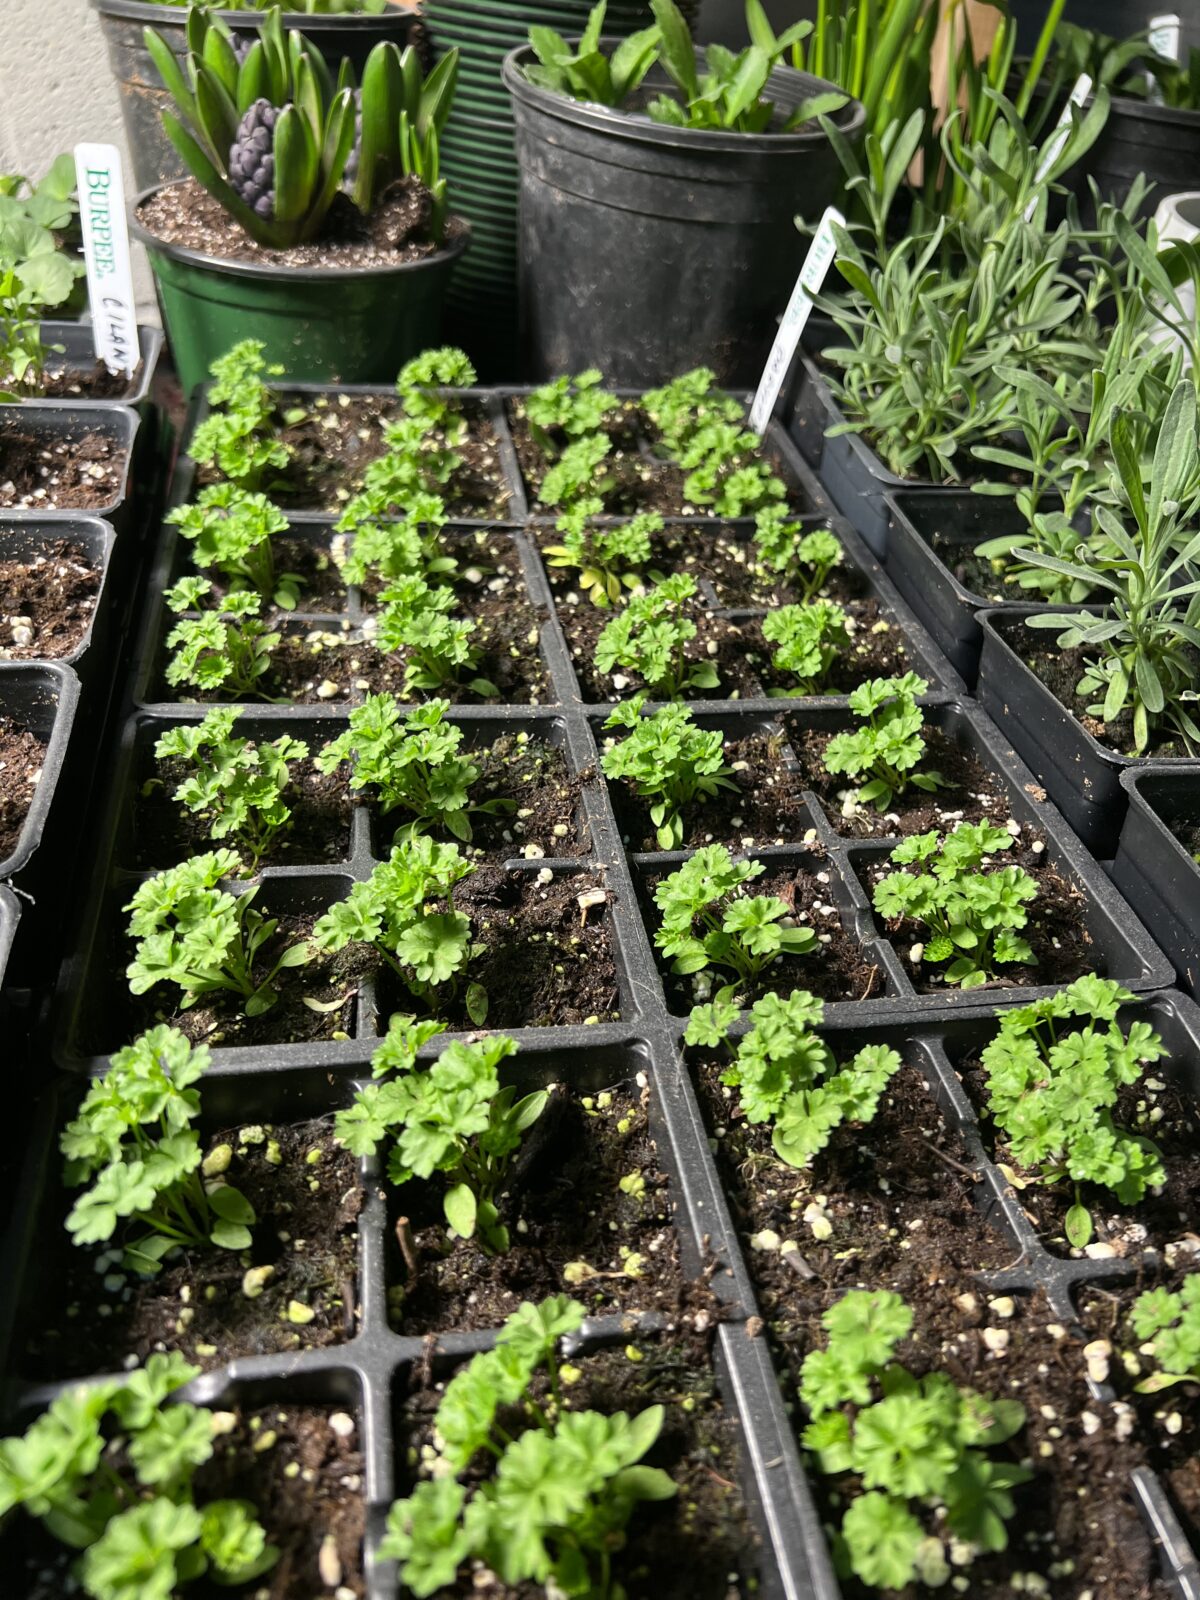
  2. Area 2: Sow parsnips, carrot, parsley (Umbelliferae). Fill gaps with lettuce and follow with a soil-enriching green manure during winter.
  3. Area 3: Grow cabbage, kale, rocket (Brassicas) during the summer and follow with winter varieties of cabbage and Brussels sprouts.
  4. Area 4: If this is your second or subsequent year, harvest the onions or leeks previously growing here over winter. Then sow peas and beans (legumes). When harvest has finished, lime the soil for brassicas which will move from area three to occupy the space next.


Categories
Farming Gardening

Quick Maturing Plants

Quick Maturing Plants: 5 Fast Growing Vegetables to Try

, written by Benedict Vanheems gb flag

Harvested beans

As summer progresses, gaps will inevitably start to appear in your garden as plants are harvested. It’s a bad idea to leave those gaps as the bare ground will attract weeds and be prone to erosion during summer storms.

But you don’t need to leave gaps at all, even if you have plans for fall crops later on. With plenty of heat and long days in summer, some plants require very little time to go from sowing to harvest time. Read on to find out which super-speedy vegetables will give you a harvest in just a few short weeks – just the job for the impatient among us!


5 Super Speedy Vegetables

1. Radishes

Sowing to harvest: 25 days

Radishes are one of the fastest vegetables, taking just three to four weeks to reach harvest time. They’re also exceptionally easy to grow.

Seeds can be sown into prepared ground or pots of potting soil. Sow the plump seeds very thinly, spacing them about one inch (2.5cm) apart. Sowing small batches every few weeks until the very end of summer will give you a continuous crop of the peppery roots.

Harvested radishes

The seedlings will pop up within three to five days. If necessary, thin the seedlings so the roots have enough room to expand. Keep the ground free of weeds, and water in dry weather. Harvest the roots before they get too large, when they can turn woody in texture and become overpoweringly hot.

2. Salad leaves

Sowing to harvest: 21 days

Ever-versatile salads present a symphony of leaf shapes, textures and tastes ideal for livening up meal times. Grow individual varieties or create your own salad blend by mixing two or more varieties together before sowing. Suitable salads include lettuce, mustards and other Oriental leaves, kale, and arugula.

For the quickest results, sow a mix of salads sold for repeat, or cut-and-come-again harvesting. Sow the seeds very thinly into drills spaced around 6-10 inches, or 15 to 25cm apart. Cover the seeds back over then gently pat the surface of the soil down. Water along the rows then keep the soil moist and weed free as the seedlings grow. If summers are very hot in your area, you may need to wait a few weeks or use shade-cloth to reduce temperatures for germination and good growth.

Salad leaves

Harvesting can start just three weeks after sowing. Take two or three outside leaves from each plant at any one time. This allows the remaining leaves to grow on and provide another cut in a few days’ time. Cut little and often for best results.

3. Bush beans

Sowing to harvest: 60 days

The quickest pods in town, bush beans, can be sown immediately after a previous crop to give a speedy picking before the end of the current growing season. Taking just two months from sowing to pod production, these trouble-free beans are a must – and kids love them!

In summer the beans can be sown directly into the ground or into pots of potting soil. Poke the seeds into the soil so they are 10-16in (25-40cm) apart. Sow a batch once a month until the end of summer. The short, bushy plants will soon come into flower.

Pick the pods every few days, as they appear, so that you are always enjoying them while they are still smaller and more tender. Regular picking encourages plants to continue forming pods. Savor the beans lightly steamed with a curl of butter and a grind of the peppermill.

4. Carrots

Sowing to harvest: 50 days

Carrots are not the most obvious speedy vegetable, but choose a quick-growing finger-sized variety and you can expect sweet, crunchy roots in just six weeks.

Sow into pots of potting soil, spreading the seed thinly over the surface, then cover with a thin sieved layer of potting soil. Or sow the seed into drills spaced about 6in (15cm) apart, cover back over, and water.

A crop of baby carrots

In some parts of the world, the larvae of the carrot fly can prove a nuisance, burrowing into the roots and spoiling the crop. A row cover will keep the flies from laying their eggs. Once the seedlings have appeared, thin them on a rainy day when there will be fewer carrot flies about, or on a still, cloudy day to about an inch (2.5cm) apart. Water afterwards to settle soil back around the roots.

Pull up the tender carrots while they are still young, if necessary using a border fork to first loosen the soil.

5. Spinach

Sowing to harvest: 30 days

The smooth, succulent leaves of spinach are extraordinarily versatile. Use them in salads, as a key ingredient to quiches and flans, or stirred into risottos or pasta dishes. Start it off once a month to enjoy right up until the first frosts.

Sow into rows about a foot (30cm) apart. Set the seeds an inch (2.5cm) apart then thin the resulting seedlings to roughly 8in (20cm) apart. Plants can quickly bolt in hot weather, which causes the leaves to turn bitter. Prevent this by sowing in light shade during the heat of summer and by always keeping the ground moist.

Spinach seedlings

Cut the leaves away using a sharp knife or scissors. Don’t let the leaves get too big, and remember to harvest little and often. Later sowings can be covered with a row cover or tunnel to help growth along as the weather turns cooler.

Preparing the Ground

Sow your super-speedy crops into well-prepared soil. This simply means ensuring the soil has enough nutrients to support healthy growth and has the right texture to encourage even germination. In most cases all that’s needed to prepare the ground is to sprinkle on a top-up of organic fertilizer before raking the soil surface to a fine tilth.

All of these super-speedy vegetables can also be grown in pots of good-quality, multipurpose potting soil.

Protecting Against Pests

While our quintet of super-speedy vegetables will have little time to attract pests, do take a few precautions. Carrot fly has already had a special mention. Use the same row covers protecting your carrots to guard against flea beetles on radishes and some salad leaves. Slugs can decimate seedlings, so set up beer traps or shady retreats such as an upturned grapefruit shell, then collect up and discard any slugs you find.

It’s perfectly plausible to sneak in some super-speedy vegetables even up until surprisingly late in the summer. Try some of these quick croppers and get ready for a bonus harvest in next to no time. We’d love to hear what other super-speedy vegetables you recommend for your area, so why not drop us a comment below and tell us.

Categories
Farming Gardening

Green Manures

Green Manures (Cover Crops) 


How to improve the fertility of your soil is a question that all good gardeners take seriously.  Or at least should. One of the most under-used methods of soil improvement is the use of green manures (often called ‘cover crops’ in America), which are essentially plants grown specifically to be dug back into the soil to improve it.  In principle this sounds pretty easy – just sprinkle some seed on the ground after the main crop has been harvested and then dig the plants in after a few weeks.  But in practice there’s a lot more to it, so I thought I would do a little experimenting to find the perfect green manure.

Cover crops, or green manures, are a great way to protect ground that would otherwise lie bare over winter. Dig them in and they’ll help to build up your soil’s organic matter – which is great news for the vegetables that follow! The end of summer is the perfect time to sow a cover crop for winter. 

Why Grow Cover Crops?

Cover crops are plants grown to protect or improve the ground for future crops. Keeping soil covered over winter protects it from erosion and helps support all the beneficial life associated with it. It also gives weeds less opportunity to establish, meaning cleaner beds for sowing or planting in spring. Dig the cover crop into the ground at the end of winter and it will rot down to add valuable organic matter, helping to feed the plants that follow.

Green manures work by drawing goodness out of the soil and storing it in the plant’s cells and root nodules.  When the plants are then dug back into the soil they rot down and gradually release these nutrients to the next crop in a more readily-available form.  Regular use of green manures improves the soil structure, breaking down hard soils and adding organic matter to light soils like mine.  Green manures can have other benefits as well.  Many of them provide good soil cover, suppressing weed growth and preventing erosion.  Others attract beneficial insects to the garden such as bees and hoverflies which prey on pests like aphids.

Which Cover Crops to Grow

Heavy Soil

Cover crops with deep or fibrous roots such as cereal rye help to improve soil structure by breaking it up. Others, like mustard, grow very fast to produce lots of lush foliage that can be incorporated into the soil after just a few months to boost its organic content. Mustard is a particularly good cover crop for clay soil, where it can be dug in before winter so frosts have a chance to break the soil up. Prolific salads such as mache or corn salad may also be grown this way.

Poor Soil / Hungry Crops

Some cover crops directly add nutrients to the soil by fixing nitrogen at their roots. Examples include winter field beans and peas, clover and vetch. These are all types of legume and are a great choice for sowing before nitrogen-hungry brassicas such as cabbage.

So how do you choose a green manure to sow?  The following types are readily available:

  • Legumes, such as winter field beans (like fava beans), lupins and fenugreek which fix nitrogen into the roots (as long as they are dug in before flowering when the nitrogen is lost). Other peas and beans, such as sweet peas, can also be used. I have used winter field beans very successfully when planting a late green manure since they will even grow when temperatures are starting to take a dive during mid-autumn.
  • Clovers, red or crimson clover being the best as it dies down, also in the legume family.
  • Winter tares, also known as vetches, are also winter-hardy but like rye they can be difficult to dig in.  Again, part of the legume family so they fix nitrogen into the soil.
  • Rye, such as Hungarian grazing rye, will grow well at low temperatures but can be difficult to dig in and get rid of.
  • Mustards, can be very effective but, as they are part of the brassica family, they can interfere with your crop rotation.
  • Buckwheat and Phacelia are both excellent at attracting beneficial insects and are easily dug in.
  • Winter-hardy salad crops, such as corn salad and miner’s salad (Claytonia) are easily dug in once used and can provide some extra salad leaves while growing.
  • Others which are not normally regarded as green manures can also do a great job.  Poached-egg plant (Limnanthes douglassii) is a great example – bright flowers, grows well over winter and digs in easily.  I regularly plant this in my garden and leave a few to flower to attract hoverflies

Whilst this looks like a wide variety of options, there are some important factors to consider.  Firstly, many green manures are great for farmers with machinery to dig in the plants but are not half as easy for gardeners who have to do it by hand.  Well-known author Bob Flowerdew recommends that you avoid ryes, tares and vetches, fodder radish, and many clovers for exactly this reason.  Secondly, not all green manures grow well on all soils.  Tares don’t do well on dry or acid soils, clovers prefer light soils and beans prefer heavier ground.

How to Sow a Cover Crop

To sow a cover crop, start by roughly digging the ground over. Remove all weeds, especially perennial ones. Tamp down the soil with the back of a rake then scatter, or broadcast, your seeds evenly across the soil surface. Don’t sow them too thickly. Rake the seeds into the soil, tamp down with the back of your rake, then water the ground if it’s dry.

The chunky seeds of winter field beans may also be sown in rows. Use a spade or hoe to dig out trenches about two inches (5cm) deep. Space the trenches eight inches (20cm) apart. Now sow them so they’re around four inches (10cm) apart then fill in the trenches to cover them.

In most cases it’s best to dig your cover crop into the soil before it begins to flower, perhaps leaving a few for early beneficial insects. At this stage the stems will still be soft, making them easier to cut up and dig in, and quicker to rot down. Incorporate the foliage into the soil or simply cut it off and leave it on the surface as a mulch for the worms to dig in for you, covering it over with cardboard if you’re concerned about weeds springing up. Cover crops should be dug in at least one month before sowing or planting so they have enough time to begin decomposing.

This year I set apart an area where I could grow three of the best as a trial: fenugreek, phacelia and buckwheat. For me, both the buckwheat and the fenugreek struggled to provide much ground cover and were relatively poor at germinating.  Phacelia was the complete opposite.  It required little weeding, quickly producing lush growth up to about 16 inches (40cm) high and even attracted a range of bees and insects if left to flower.  I shall be sowing more of it before the end of the season and plan to incorporate it in several places across my garden next year, particularly because it’s from the waterleaf family of plants and doesn’t interfere with crop rotation.

So if I was asked to name my top three green manures they would be phacelia, poached-egg plant and winter field beans.  I’m still on the lookout for other good green manures though, so please do share your experiences below.


Author: RNW

Categories
Farming Gardening

Flowers for Vegetable Gardens

Flowers for Vegetable Gardens – beyond just good neighbors!


Its easy to get carried away with beautiful sights and wholesome colors of most flowers, especially when in full bloom. And one can almost never get blamed for planting too many flowers. 

Pretty as they may be, each flower in the garden has a purpose. Or should have a purpose. This doesn’t mean that your vegetable garden should be left bereft or devoid of flowers. Flowers play an important role in any organic garden but the criteria for selecting them should be  different to ornamental gardens – it’s not the size or color of the flowers that count but their attractiveness to the right kind of insects. In other words, its what the flowering plant contribute to the vegetable garden other than their primary show and pomp.  

There are two classes of beneficial insects that may be targeted by the flowers to attract:

  • Insects that eat pests: Hoverflies, lacewings, ladybugs and others are all the very best protection a garden can have against the invasive pests that feed on crops such as aphids, mites, thrips, mealybugs and scale insects.
  • Insects that aid pollination: Bees are the primary pollinators (both honeybees and bumblebees) and need as many good sources of nectar as possible given the current sharp decline in numbers. However, many other insects can help pollinate crops including wasps, moths, butterflies and certain species of beetle.

How do you select the best flowers for your vegetable garden? The key is to pick flowers that are rich in high-protein pollen and that provide sources of nectar throughout the year (known as insectary plants). Many highly-bred ornamental flowers fall short on these criteria so it’s important to choose flowers that are known to attract beneficial insects. Here is my guide to the best flowers for vegetable gardening, all of which I have used with varying degrees of success in my own garden. To make the list they had to be easy to grow, attractive and have plenty of beneficial properties:

Calendula: Known as ‘pot marigolds’ but actually unrelated to the more common marigold family of plants (Tagetes), calendula is easy to grow and keeps flowering through the summer if you regularly pick off the seed heads. You can easily save the large curled seeds as they are easy to handle as well as drying and storing well.
Marigold: The bright yellow blooms of the many kinds of marigold are good at attracting hoverflies, bees and butterflies and the strong scent of the French Marigold types is said to deter nematodes. Like Calendula they will grow in almost any kind of soil, are easy to save seed from and often confuse pests if inter-planted with vegetables.
Chamomile and Daisy: Most composite flowers from the daisy family will attract a range of beneficial insects. The flowers may not appear to be stunning but hoverflies and predatory wasps love them. An added benefit of growing chamomile is that you can make delicious fresh herbal tea from the flowers.
Poached Egg Plant (Limnanthes douglasii): One of my favorite flowers for growing along the edges of raised beds. Not only is it great at attracting hoverflies and bees but it also produces lush green stems that can easily be dug into the soil when flowering is over.
Onion and Garlic: It’s not uncommon to have some onions or garlic bolt (shoot up flower heads) or produce much smaller bulbs than expected. Rather than pulling them straight up I like to leave these ones in the ground and let the flowers fully develop. Hoverflies love them and they look quite unusual and attractive too.
Parsley, carrots etc. (the umbelliferae plant family): Again, leaving excess plants from this family to ‘flower’ attracts many beneficial insects such as hoverflies. Although not very colorful I do like the patterns of the flower heads.
Comfrey: Bees love comfrey and it also provides the perfect source of nutrient-rich mulch for your crops. However, it is highly invasive, so make sure you check out our comfrey article first.
Nasturtium: These do the opposite of attracting beneficial insects – they are highly effective at attracting blackfly away from your main crops. They lose their beauty once covered in blackfly but it is easy to remove the affected stems and dispose of them away from the vegetable plot.


Along with the above flowers, many green manures(cover crops) double up as excellent insectary plants. The following are particularly worth mentioning:

Phacelia: I love this plant and can never bear to dig it into the ground. Because it over-winters well it provides the perfect nectar source for bees as they emerge from hibernation and its lavender-colored flowers are quite distinctive. It can be left right through spring until the early summer crops need the space.
Buckwheat: Equally good at attracting beneficial insects, this takes up less space than phacelia but consequently needs to be sown more thickly if using it as a green manure.
Clover: Bees just love clover and honey bees use it to produce a delicious clover honey. Red or crimson clover is a fantastic source of nitrogen for the soil too, widely used in organic farming.
Categories
Fruit and flowers Gardening

Planting Fruit Trees


How to Plant Fruit Trees

Growing fruit is one of the most efficient forms of gardening. Once the trees are established you can expect an abundant supply for decades with only a little pruning and mulching to keep them happy.

With few exceptions, for most people the cheapest way to start a mini-orchard is to buy bare-rooted plants: those sold without a pot. These bare rooted plants are delivered to tree nurseries who then package and sell them directly or ship them. As well as saving money, you will often find a much wider selection of varieties and sizes available as bare-rooted trees. Many wonderful varieties of apples, pears, plums, etc., can be grown by home gardeners that are not grown commercially hence never available in supermarkets. Further the trees can be trained to fit the area you have for your garden.

However, the grass is not all that green! At least not yet. Bare-rooted trees need to be planted correctly and given careful treatment during the first year in order to establish healthy root systems, stay relatively disease free and give a reliable harvest for years to come.

Until the root system is at least as large as the tree it supports, the tree is particularly vulnerable to environmental stress. During the first year, the tree can easily die from not getting enough water or nutrients. Keep the tree well watered, especially during dry weather. A good soaking once or twice a week is much better than surface watering daily, though during very hot weather it can be worth doing both. It’s also vital to keep the area around the tree completely free of weeds and grass as they will compete with the young tree, which is why mulch mats are very effective.


When to Plant Fruit Trees

Getting sufficient water and nutrients in the first few months after planting is essential and that’s why the timing is crucial. The number one priority is helping your new tree establish a healthy root system.

  • In mind climates, fruit bushes and trees can be planted from November onwards and this gives them a few extra weeks for the roots to establish. (The South and Pacific Northwest would be fine for planting at this time of year.)
  • In the coldest regions, the best time to plant bare-rooted trees is towards the end of winter or the first half of spring, once the ground is no longer frozen so it can be easily dug but before new growth starts.

You will need to plant them quickly once they arrive—usually within a couple of days, though it’s possible to pack the roots with moist earth to extend this period if conditions outside aren’t favorable. It’s worth consulting a tree nursery that knows your area and can advise on the window of time when they lift the young plants and deliver them and when conditions are right for your area.

If you miss the ideal window of time for your area but still want to plant this year, it’s worth paying more for container-grown plants. These will already have roots that have grown into the soil around them and as long as you don’t disturb these too much when planting, they’ll be ready to draw up moisture and nutrients during warmer weather.

Where to Plant a Fruit Tree

Fruit trees don’t like to be moved so it is important to get the location right first time. Things to consider are:

  • Sun or Partial Shade: Nearly all fruit trees require plenty of sun but by carefully scouring catalogs you’ll find there are some less well-know varieties that are tolerant of partial shade. Don’t just consider the ground; it’s the leaves that need sun and this often opens up possibilities for otherwise unproductive areas.
  • Soil: You should strongly consider getting your garden soil tested. Most trees will want free-draining soil, enriched with compost. Avoid areas that regularly flood or higher ground that dries out quickly.
  • Wind and Snow: Be aware of the direction of prevailing wind and any large buildings nearby. A wall or fence may create a sheltered environment perfect for heat-loving fruits, or it could funnel icy winds during winter. Roofs can dump a ton of snow on an unsuspecting tree below, snapping its branches. Observe your garden closely to choose the best spot.
  • Other Plants: Trees are remarkably good at drawing up nutrients and water from the surrounding area. Unless you’re using raised beds, remember that a nearby fruit tree or bush may compete with your other plants.

Tree Planting Tips

Many good fruit-tree suppliers will sell reasonably priced kits that include a stake, tie, mulch mat, etc. and it’s a false economy to skip these items.

Follow these simple steps to give your tree the best start:

  1. Dig a hole about a spade’s depth and around 3 feet wide. A square hole is better than a round one as it encourages the roots to push out into the surrounding ground. Keep the soil you have removed in a wheelbarrow or on a large plastic sheet.
  2. Add a few inches of good garden compost and work it into the base of the hole using a garden fork. Mixing is important so that the tree’s roots don’t meet a sudden boundary between compost and regular soil. Also mix some compost into the soil you removed.
  3. Look for the slightly darker ‘watermark’ on the tree’s trunk that indicates where the soil level was when it was first grown. Place the bare-rooted tree in the center of the hole and a cane across the hole so you can check that this line is level with the soil around your hole as trees shouldn’t be planted deeper or shallower than they were first grown. If necessary, add or remove soil to achieve this. Most fruit trees will be grafted onto a rootstock and the join should always be above ground.
  4. Remove the tree and put in a thick wooden stake a couple of inches from the center of the hole and on the side where the prevailing wind comes from. Hammer this firmly into the ground using a mallet.
  5. Place the tree back in the hole close to the stake and start to shovel the soil-and-compost mix back around the roots. Gently firm this in with your boots, being careful not to damage the roots. When it’s half full, pull the tree up an inch and then let it drop again as this helps the soil to fill in around the roots.
  6. Once all the soil has been added and firmed, fix the tree to the stake with the tie, leaving enough room for the tree trunk to grow but not so much that it wobbles about. Also add a protective tube around the trunk if animals are a problem. At this stage I also sprinkle a little seaweed meal fertilizer around and cover it with a bio-degradable hemp mat to suppress weeds.
  7. Water the soil well to stop the roots drying out and to further settle the soil around them.


Until the root system is at least as large as the tree it supports, the tree is particularly vulnerable to environmental stress. During the first year, the tree can easily die from not getting enough water or nutrients. Keep the tree well watered, especially during dry weather. A good soaking once or twice a week is much better than surface watering daily, though during very hot weather it can be worth doing both. It’s also vital to keep the area around the tree completely free of weeds and grass as they will compete with the young tree, which is why mulch mats are very effective.

Finally, don’t forget to remove all blossom from the tree in the first year. Although it’s tempting to let some fruit develop, doing so may again place more stress on the tree as it establishes and forgoing the first year’s fruit will result in a much healthier tree and better harvest in years to come.

Categories
Farming Gardening

Vegetable Gardening

New Gardens

When planning a vegetable garden it’s all too easy to jump in with both feet and try to grow as much as possible in the first year. Many experienced gardeners will tell you that this is just setting yourself up for disappointment as the amount to learn, maintain and weed can quickly become overwhelming. Far better is to make a list of your favorite vegetables and narrow it down to the ones that taste best fresh or cost a lot to buy in the shops. Plan to create a few vegetable beds each year, expanding as you become confident and find the timesaving shortcuts that work for you. Defining good paths (using materials such as woodchip and weed suppressant fabric) will pay back many times over in the time saved maintaining them.

If the area you are going to use for your vegetable garden is new then the next decision is what style of garden and planting system you would like to use: raised beds, traditional rows, square foot gardening etc. In general it’s a good idea to define garden beds 4 feet (1.2m) wide and as long as you want them to be with a 2 foot (60cm) path between them. This is about as wide as you can go before it becomes uncomfortable to lean into the middle of the bed (you’ll appreciate this when weeding) without treading on the soil (best avoided as it compacts the soil structure). If you have children around then it’s useful to clearly mark the edges and building raised beds is a good way to do this (also good if you have heavy or waterlogged soil as they drain well.)

Companion Planting

Many different crop layouts can work for a particular garden space and there will be far more variation in the harvest due to factors beyond our control such as weather and pests than in whether leeks should be placed next to carrots. Although some gardeners swear by complex companion planting systems the main principles that have been proved to work are summarized as:

  1. Mix up plants to confuse pests: Large areas of a single crop (or a single crop family) attract pests whereas mixed planting can confuse them. The one exception to this is where plants require special protection, for example, cabbages, broccoli and cauliflowers may be grown together if they are all going to be protected from caterpillars in a tunnel of netting or horticultural fleece.
  2. Grow insectary plants: There are a number of well-known flowers that attract beneficial insects (ladybugs, hoverflies etc) that will naturally control pests. See my article on Flowers for Vegetable Gardens for help in choosing these.
  3. Consider Shade and Support: Tall plants can shade others or can be used to offer support to others e.g. climbing beans can grow up sweet corn.

Step-By-Step Planning

With these general principles in mind here are my recommendations for placing plants in a new vegetable garden:

  1. Tender Plants: Plants such as tomatoes, peppers, eggplant, basil etc are the most fussy. Unless your climate is extremely warm you’ll want to reserve the best sunny spots in your garden for these high-value crops so add them to your plan first. South facing walls can be particularly good for providing the heat that these plants like in order to produce an abundant harvest.
  2. Roaming Plants: Next place plants that like to send out vines that roam around the garden – melon, squash etc. These need to be situated at the edge of your vegetable beds so the broad leaves attached to the vines don’t cover your other plants. Placing them at the edge lets them spread out across paths or grass.
  3. Vertically Climbing Plants: Anything that grows up supports – peas, beans and some squash such as cucumbers, will need to be located where they won’t shade other vegetables. The one exception is areas with very hot summers where some cool-season crops such as lettuce and spinach can benefit from shade in the heat of the day.
  4. Irrigation: Some plants perform badly in dry conditions – celery, onions, strawberries etc. Areas of your garden that are slightly lower will retain more moisture or you may need to plan to provide irrigation to get consistent growth.
  5. Pollination: Certain plants need to be near others in order to pollinate well and ‘set fruit’ (ie produce the edible portion). The main one you need to consider is sweet corn which should be grown in blocks to ensure that it produces full cobs.
  6. Accessibility: What plants do you want to be able to regularly harvest? Herbs, salad, tomatoes etc..? These should all be placed as near to your kitchen as possible. Not only will you then be more likely to use them but it will help you to keep on top of the weeds and remove slugs regularly.
  7. Succession Planting: If you are short of space or want a crop throughout the season, consider using succession planting and intercropping.
  8. Don’t Overcrowd: Finally, tempting though it is, be very careful not to overcrowd plants as you add in the remaining ones to your plan. This is the number 1 mistake made by new gardeners and it’s easy to see why – plants look so small as seedlings and we all hate pulling up the result of our hard work to thin them out! Our Garden Planner can help with this and show just how much you can get into your space.

An Art or a Science?

Gardening is both an art and a science and it’s that tension that is at the root of the confusion for many new gardeners. There are scientific principles that need to be followed – overcrowding plants or growing in poor-quality soil will set you up for failure. In subsequent years the principles of crop rotation will add more constraints. However, that still allows for a lot of different possibilities and the art is in placing plants in a way that makes best use of your space without breaking any of the rules.

It’s worth remembering that these aren’t a hard and fast set of rules. The art is in using these guiding principles to design something that’s uniquely your garden and, with experience, that becomes a very satisfying and enjoyable process.